Do you receive the Overtime Cook email newsletter? I send out a weekly menu plan, plus more. Click here to sign up. P.S – it’s completely free! This is probably the number one most popular recipe from my cookbook, Real Life Pesach Cooking, and for good reason! It's got the most incredible can't-believe-it's-not-chometz texture, it's easy to make, and it's just so deliciously tasty. What's not to love? I figured it's time to give it a spot here on my blog, so here we go! Enjoy! Tip: For a chocolate cake, replace the vanilla pudding mix with chocolate pudding mix. Or make one of each and marble them together. Did you know that I share cooking demos, menu plans, … [Read more...]
Honey Lemon Bundt Cake
Do you receive the Overtime Cook email newsletter? I send out a weekly menu plan, plus more. Click here to sign up. P.S – it’s completely free! If you're one of those people who thinks you don't like honey cake, I'm here to change that. If you are of the opinion that honey cake has got to be dry and bland, I'm here to change that. If you feel like honey cake is something to make for Rosh Hashanah because of tradition and not because anyone actually wants to eat it....you guessed it - I'm here to change that! This honey cake is so moist, so flavorful, honestly so perfect - you may never make another honey cake for the rest of your life. Adding the lemon pudding mix is the secret to both … [Read more...]
Honey Blueberry Bundt Cake

Do you receive the Overtime Cook email newsletter? I send out a weekly menu plan, plus more. Click here to sign up. P.S – it’s completely free! Blueberries in baked goods will always be one of my favorites, and this spectacular blueberry bundt with honey flavor infused throughout is definitely going to be a hit on your table as well! Did you know that I share cooking demos, menu plans, giveaways, and lots more exclusive content on Instagram? Follow me there for all that bonus content that you don’t want to miss! Like This Recipe? You will absolutely LOVE my cookbooks! They also make a great gift! Click here to purchase Something Sweet. Click here … [Read more...]
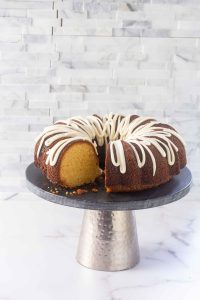
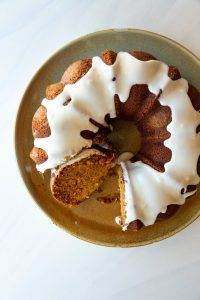
Honey Pumpkin Bundt Cake

Do you receive the Overtime Cook email newsletter? I send out a weekly menu plan, plus more. Click here to sign up. P.S – it’s completely free! If you've been following for a while, you probably won't be surprised to hear that I make a LOT of bundt cakes. And ever since I moved to Los Angeles to be a Rebbetzin(!), I bake even more of them. They're generally really delicious, but this Honey Pumpkin Bundt Cake really stands out. No jokes. I cut it open and saw the texture, then I tasted it. And I am not exaggerating when I say that I. Was. Speechless. The flavors of this cake are just so spot on, and the texture is as perfect as you'll find in a Bundt Cake. I hope I convinced you … [Read more...]
Strawberry Rosé Bundt Cake

Do you receive the Overtime Cook email newsletter? It’s full of recipes, kitchen tips, menus and more! Click here to sign up. P.S – it’s completely free! A while back, I published this recipe in my column in Mishpacha Magazine's Family Table. In that intro, I wrote that this might just be the best Bundt Cake recipe I have ever created. And let me tell you friends, I don't think it's an exaggeration to say that I have created hundreds of Bundt Cake recipes. So what makes this one the best? Well, it's hard to say where the magic really lies. Maybe it's in the delicate fruity taste of the cake? Maybe it's in the crazy-amazing texture? Maybe it's just so easy to put … [Read more...]
Honey Crumb Cake

Honey Crumb Cake is a richly flavored cake with loads of crispy, cinnamon flavored crumbs piled on top! Do you receive the Overtime Cook email newsletter? It’s full of recipes, kitchen tips, menus and more! Click here to sign up. P.S – it’s completely free! I must confess. I dreamed up this cake for the first time two years ago. I had plans to make and post it in time for Rosh Hashanah, but other things got in the way, so I promised myself "next year!" Then last year came around and I just couldn't get it one in time. I was so disappointed. Once again, I promised myself that I would get to it...next year. Well friends, I am pleased to tell you that … [Read more...]
Honey Spice Bundt Cake {No Mixer}

Honey Spice Bundt Cake is perfectly moist and takes just minutes to prepare! Do you receive the Overtime Cook email newsletter? It’s full of recipes, kitchen tips, menus and more! Click here to sign up. P.S – it’s completely free! If you're looking for a honey cake that comes together in just minutes, freezes nicely, and requires no mixer, look no further than this incredibly delicious gem. The honey flavor really comes through beautifully and strongly, and it's complemented perfectly by the warm fall spices throughout. Not a fan of all of these spices? Not to worry - you can pick and choose which to include. Ooh and the best part? You know that gooey yummy top you … [Read more...]
Coffee Chocolate Crumb Cake {no-mixer}

Coffee Chocolate Crumb Cake is bursting with flavors of coffee and chocolate, glazed with a delicious glaze, and looks so impressive despite being a no-mixer recipe that's super easy to make! This post is sponsored by Misceo Coffee Liqueurs. All opinions are, as always, my own. Thank you for supporting the brands that support my business and allow me to provide free recipes for you. Do you receive the Overtime Cook email newsletter? It’s full of recipes, kitchen tips, menus and more! Click here to sign up. I'm so excited to partner, once again, with Misceo Coffee Liqueur to share a phenomenal new cake recipe. I love that this cake looks really nice (and see the FAQ for a beautiful … [Read more...]
Honey Coffee Bundt Cake

Coffee and Honey Flavors combine perfectly to form this delicious Honey Coffee Bundt Cake. This post is sponsored by Misceo Liqueurs, and ll opinions are 100% true and my own. Thank you for supporting the brands that support this blog and allow me to continue providing free recipes for you! Do you receive the Overtime Cook newsletter? It’s full of recipes, kitchen tips and more! Click here to signup. Are you guys ready for Rosh Hashanah? I'm not. I can't really believe that summer is over...what happened?!? Well, it's not all bad. I don't know about you guys, but I loooove fall baking. Cinnamon, apples, pumpkin spice, honey...I'm here for ALL. OF. IT. So today, I'm starting off … [Read more...]
Flourless Fudge Cake Without Butter or Margarine

Flourless fudge cake without butter or margarine is a gluten-free passover treat that you're going to love! Have a question about one of my recipes? The best place to get answers is the Overtime Cook Recipes Facebook Group! Click here to join! Who's ready to cook for pesach already? Not. Me. Pesach is eight days long, and I am all for minimizing the amount of time we have to avoid chometz. Speaking of prolonging pesach food, can we discuss a seriously big pet peeve of mine? I hate how all kosher grocery stores start preparing for pesach the day after purim. Listen I get it - they need time to prepare for a really busy season. But here's the part that drives me crazy - why do we … [Read more...]
- 1
- 2
- 3
- 4
- Next Page »